In this article, we’ll show you how to safely install a ceiling fan for those hot days where there seems to be little to no fresh air.
To make this process simple, this article has been broken down into 4 major parts with subheadings under each process:
- Removal of the old fixture.
- Attachment of a new ceiling box.
- Assembly of the ceiling fan.
- Mount the fan.
Table of Contents
1. Removal Of The Old Fixture
Disconnect Electricity From Your Circuit Breaker Box
- In dealing with electrical wiring, ensure you cut off the power leading to that area before you touch anything. Safety is of the greatest importance.
- Now, look for the location of your home circuit breaker box, then turn the power off leading to the part of the house or room you want to install the ceiling fan.
- Please note that some houses have several breaker boxes with one principal and various sub breaker boxes in different areas of the house. If this is the case in your home, make sure you switch off the power supply at the sub breaker box and the principal box before you commence work.

Take Out Screws Holding The Old Fixture
- You will need a ladder or a step ladder to do this regardless of your height as you will need unobstructed access to the fixture. While you remove any screws securing the fixture to the roof, ensure you’re holding it with one hand.
- Once the screws have been removed, gently remove the old fixture from the ceiling.
- Just in case you don’t have any old fixture where you would like your new ceiling fan installed, it is advisable to hire a licensed and professional electrician to install one in your home. This is because wiring needs to be run through the walls and it involves electricity. Don’t risk your life, don’t experiment, working with electricity is dangerous so make sure you call a licensed professional.
- As you remove the screws, if you find it difficult to work and hold it in place, then get someone to help you to prevent the fixture from falling while also making your life much easier.
Disconnecting Wires From The Previous Electrical Fixture
- If you look closely and carefully, you’ll notice there’s a meeting point inside a plastic connector. This connector connects the wires leading from the ceiling with the wires leading from the fixture.
- Make sure you support the fixture as you start to unscrew and remove each of the plastic connectors.
- Once they have all been disconnected, gently lower the previous fixture from the ceiling. You can either throw it away or keep it in a safe place just in case you need to use it in the future.
- Please note – Don’t attempt to cut any wires or rewire any of the wires in the ceiling without a licensed electrician. We would recommend you don’t even touch any wires even when an electrician is present, let them do that aspect of the work.
- Also, ensure you have something to support the fixtures you’ve removed or installed while you work on them. DO NOT allow the fixtures to only have support from the wires holding them up because this might cause damage to them. If someone else is not available, wait until you have an extra set of hands to help you.
Removing The Previous Ceiling Box
This is a circular metal fitting which other fixtures are attached to. Carefully look for screws and or nails that hold the ceiling box in place, then remove them. Now remove it from the ceiling as gently as you can.

Click here to get the Honeywell Ceiling Fans 50608-01 Xerxes Ceiling Fan, 62, Brushed Nickel now!
2. Attachment Of A New Ceiling Box
If The Fixture Is Positioned Between Two Ceiling Joists, Buy A Fan Box With A Hanger Bar
- What’s a hanger bar? It’s a rod that can be extended and can be held taut between two ceiling joists. This basically gives you an object to attach the fan to.

Click here to get the Westinghouse Lighting Saf-T-Brace for Ceiling Fans, 3 Teeth, Twist and Lock now!
- You can buy a fan box which has a hanger bar from any local store which sells electrical goods. This applies if you intend to install your fan between two ceilings joists.
- Check by directing light from a flashlight into the hole located in the ceiling where you want to install the new ceiling box. You should see a long piece of wood above the hole, directly above it. If not, then this means the ceiling box will be installed in the middle of two joists.
- To be doubly sure, try and find the studs installed inside the ceiling.
If You Have Access To A Single Ceiling Joist, Ensure You Choose A Box With A Fastening Screw
- Just in case the hole in the ceiling is below a wooden frame, you can make use of a fan box that you can screw directly into the framing. A fan box with no hanger bar can be bought from an electronics or hardware store closest to you.
- Take a closer look at the hole where the ceiling box will be installed. If you can see a joist just above the hole to see if something can easily be screwed in the joist. If this is the case, make sure you install a screw fastening fan box.
Make A Cut Around The Hole
This is to ensure that it’s the appropriate size as typically fan rated ceiling boxes might be larger or a little bit thicker than the average ceiling box.
- Place the fan box on the hole and make a tracing around it using a pencil.
- To cut away any excess ceiling to allow the fan box to fit properly, you can make use of a drywall saw.

Click here to get the DEWALT Standard Jab Saw now!
- As you cut through the ceiling, be very gentle and careful so you don’t cut through any electrical wiring inside the ceiling. Cut through the ceiling as shallow as you possibly can in order to prevent mishaps.
Pass The Cables Through The Newly Installed Electrical Box
- Lift the newly installed ceiling box into the ceiling. While you do this, pass the wiring coming out of the ceiling through a central hole present inside the ceiling box.
- If your fan box is fitted with a cable clamp, pass the wiring through this area also. Push the cable clamp over the wires till it is sitting on the surface of the fan box.
- Ensure the screws are tightened on the cable clamp in order for the wires to be held in place.
Ensure The Fan Rated Ceiling Box Is Securely In Place
- If your fan box is attached directly to the ceiling joist, place the box beside the joist, then fasten it securely by using the screws provided.
- If you need to use a hanger bar, make sure the bar is positioned between the two joists.
- You can make use of an adjustable wrench in order to extend and rotate the bar.
- Rotate until the bar is securely held in place in between the two joists.
- Carefully read through and follow the instructions of the manufacturer in order to attach the fan to the bar hanger.
Attaching The Bracket Or Ceiling Plate
- The fan bracket or ceiling plate is the fixture from which your fan is suspended from. Place this ceiling plate by the fan box and then pull all the attached wires through the hole in the center. Use screws to secure the ceiling plate tightly and securely.
- Remember to follow the instructions of the manufacturer when you’re handling particular parts. Note that the technique to attach brackets and ceiling plates might differ. However, it has to be done properly to ensure the fan remains attached to the ceiling when you’re done installing it.
- Now is the time to attach any molding you would like to attach round the fitting or a ceiling medallion. These are decorative pieces surrounding the fitting and they are usually firmly attached and secured to the roof.
- To hold it in place to the roof, you can use a little urethane-based adhesive before locking it into place with finishing nails. Four nails should do this nicely. For an aesthetic finish and appearance, the nail holes can be covered with spackle or caulk.

Click here to get the Hunter Indoor Low Profile Ceiling Fan, with pull chain control – Crestfield 42 inch, Nobel Bronze now!
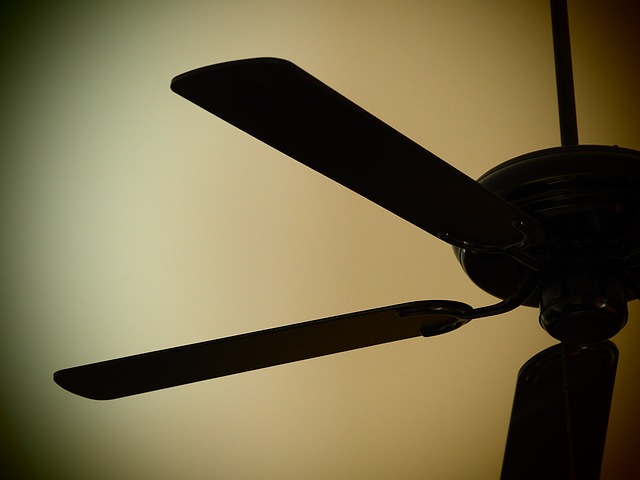
3. Assembly Of The Ceiling Fan
Purchasing a new fan kit
- A fan kit contains all the required parts for assembling a new ceiling fan. You can purchase a new fan kit online or from a local shop that sells electrical equipment.
- When buying, remember the size of the room where you intend to install your new ceiling fan. Below are some sizes to assist you in your buying decision:
| Approximate Room Size | Suggested Fan Size |
| 144 square feet (13.4 m2) | 36 inches (91 centimeters) |
| 144 square feet (13.4 m2) – 225 square feet (20.9 m2) | 42 inches (110 centimeters) |
| Anything larger than 225 square feet (20.9 m2) | 52 inches (130 centimeters) |
Attaching The Fan Body To The Down Rod
- The long metal pipe which serves to create a distance between the fan and the ceiling is referred to as the down rod.
- Place the body of the fan on the floor then run the wires which are attached to the fan in through the down rod.
- Now you need to make sure the screws locked around the base of the down rod are tightened securely and firmly attached to the body of the fan.
- Remember, when in doubt about the way your fan was constructed and assembled together, read the instructions from the manufacturers again to make sure you’re on the right installation path.
- Some fan models might contain several locking screws to secure the down rod firmly in its place. Double check you have tightened them all so the down rod and the body of the fan do not disconnect while you’re mounting the fan.
- Some factors may change the length you require for the down rod of your ceiling fan including the way your roof is angled. You may be required to use a down rod to stop the fan blades from damaging the roof.
- If your ceiling is taller than 8 feet (2.4 meters), use a down rod which is a minimum of 10 inches (2.5 centimeters) long so as to get the maximum circulation of air around the room.
- If your ceiling is lower than 9 feet (2.7 meters), use something called a hugger ceiling which is designed especially for lower ceilings. The down rods are usually much shorter and allow them to remain as close to the ceiling as possible.
Lifting The Fan To The Ceiling
- To do this, use a step ladder or a ladder to cautiously lift your assembled fan to the ceiling. A number of fans usually have a way of suspending them a little below the ceiling while you’re connecting the wiring.
- If this is not the case, get someone to assist you.
- Ensure the ladder is securely in place and it can be stood on safely. If not, ask an electrician for assistance.

Click here to get the Ceiling Fan Retractable Blades Vintage Cage Chandelier Fan with Remote Control (5 Edison Bulbs Needed Not Included) now!
Connecting Neutral Wires
- Neutral wires are a path of return for the current which comes into the fan and usually has an insulated cover which is normally white in color.
- Place the two neutral wires together then twist their stripped ends together. Secure them by using a plastic wire connector to hold them together with electrical tape.
While these steps are pretty easy to follow, we are pretty sure seeing someone do it will make the process a lot easier. Check out the video below for a step-by-step guide on how to install a ceiling fan