Handling electrical issues (how to install a ceiling fan with light, for instance) can sometimes seem like a hassle but the truth is, sometimes, it’s actually quite easy. If done with the right amount of planning and instructions you could handle it yourself and pretty easily too.
Now ceiling fans are quite easy to install. They do not require a high level of technical know-how to put in place and are quite easy to put together.
Some houses provide a space for you to mount your fan. If you’re lucky and happen to live in houses like this, then your installation job isn’t going to be much of a hassle. But if you’re dealing with an apartment that has no electrical fixture then your job might become a tad bit more complicated.
But that’s why you’re here, and that’s why we’ve put this article together for you, to give you the right instructions on how to install a ceiling fan with light.
Table of Contents
How To Install A Ceiling Fan With Light – Steps To Follow For A Safe Installation
Step 1: Bracing, Joists, And Support
The first step is figuring out just where you plan to put up your ceiling fan. Now, most people generally think that the correct place to put it up would be the center of the room for maximum circulation and that might be true. But that’s only possible if the expected point is able to carry the weight of a ceiling fan.
Now a ceiling fan weighs at least 20 pounds, and that’s more weight for just any hanghold. To make sure the weight of your fan is well supported make sure that the hole created lies between two joists.
What is a joist? A joist is a structural member that spans horizontally between the foundations of a building, or between walls or structural beams. In combination with other joists, it provides support for a ceiling and/or floor.
Due to the fact that a joist ensures support, it is essential to pick a spot that aligns two joists so as to get maximum support to carry the full weight of the fan. Once this has been figured out the next step would be to attach the fan’s electric box and bracing to the selected joists.
A fan’s bracing unlike the ones created for lighting happens to be put together in order to carry the weight of the fan. Insert the bracing into the hole created and screw the shaft by hand to latch the bracing to the joists.
After this, you then attach the electric box through the hole and secure it to the bracing. Be sure to go through the manufacturer’s manual to get proper instructions on doing this. That way you minimize fault. Ensure the bracing is secure enough to carry the weight by pulling in it. That way you can be sure no accident will happen later.

Click here to get the Hubbell Raco 936 Ceiling Fan Box and Support, 4 inches now!
Step 2: Electrical Setup
Once this is done, the next step is figuring out the electrical setup for supplying the power to run the ceiling fan. It might be possible for you to divert some electric power from an already existing circuit.
However, on the chance that none is available or the available circuit seems susceptible to an overload, the next course of action would be to create a separate circuit for the fan. You can do this by running a wire to the electric breaker.
There is also the decision of selecting the fan’s position on the wall. A good way is to figure the working of the wiring in the room and position it at one of the electrical boxes created to serve as switches.
We’re now going to have to deal with mostly electrical work so the next thing to do is to turn off the electrical breaker channeling power to the room where the fan is being installed. Make sure to take extra precautions and test the wiring to make sure no current is being channeled after the circuit has been switched off. This is easily done with a No-contact Voltage Tester.
Once this has been done, measure the distance from the fan’s regulator to the expected position of the fan. Upon noting this down, the next step is figuring out the wiring and this involves running a wire through the walls between the electrical box of the fan’s box and the actual electric box of the fan.
One of the easiest ways to do this would be to run a wire with a fish hook. Simply work your fish hook into the holes between your wall bracket and the fan’s electrical box. Upon doing this, attach the wire to the fish hook with some adhesive tape and pull till it gets to the other point.
Be sure to confirm that the wiring being used matches the gauge of the wiring already available within the circuit being used. This is so as not to short-circuit the entire breaker from overloading the wiring. Also, make sure to allow enough slack when putting together the wiring so as to have enough wires to attach to the regulator and the fan.
Again, while moving the wiring through the walls, be sure to pin down the wiring to the joist following the path of the wiring so as to hold the wires fully in place. Once the wires have been fully attached pull the rest of the wiring through the electrical boxes. Once this has been completed the next step is then correctly matching the wirings at the wall switch.

Connecting The Wiring
When working with connecting wiring one has to take proper precautions as well as be very aware of one’s actions so as not to suffer an accident. Now, in most cases, the wiring will have 3 different colors all reflecting different electrical energies.
When making connections to the switch ensure that all cables connected are carefully wrapped with black adhesive tape, or a cable connector to block off contact with the other wiring so as not to have two opposing currents interact and create an electrical issue.
When connecting, be sure to strip off the outer covering of the wire in order to get to the naked copper underneath. After doing this, connect the wiring to the matching color of wiring in the regulator. If there happen to be pins for holding the wiring in place make sure to match the colors to their respective power charges.
Red wiring is for the live charge, black for ground charge and green is for neutral. The connection at the wall bracket will be dependent on what you, the user, would prefer. Some connections work simply by turning the fan off and on while others regulate the speed at which the fan rotates. The light switch would also accompany the regulator or the wall switch
At the fan’s electrical box, after having pulled the wiring through, the next step would be to mount the fan. This can only be done after the fan has been fully assembled. Make sure to read through the owner’s manual so as to correctly put the fan and light together before mounting it on the bracing.
Take care to test the ability of the bracing to support the mounted fan by pulling on it a little. Once this is done, the connection for the wiring should be done so as to ensure the flow of electricity through to the fan.
For a more detailed guide on installing a ceiling fan without wiring, click here to read How To Install A Ceiling Fan Where No Fixture Exists. It leaves no stone unturned.
Step 3: Connecting The Ceiling Fan And Light
Now ceiling fans with light tend to be a bit complicated due to the addition of a fourth wire which is more than the three available within the electrical boxes. This is due to the ceiling fan having an extra attachment which is the lighting.
Now once you have mounted the fan ensure to follow these wiring instructions to install a ceiling fan with light.
1. Match the white wire within the fan to the corresponding white wire in the electrical box. Do this by striping the plastic tubing surrounding the copper beneath on both wires and twisting them together.
2. Match the green wire to the corresponding green wire. Repeat the same actions as with the white cable
3. Now there happens to be only one cable available in the ceiling junction box and 2 cables within the fan. Match the black wire and blue wire from the fan with the available black wire from the ceiling electrical box.
Once this is done make sure to wrap the naked copper wiring with black adhesive tape or if you happen to cable connectors use those instead so as to ensure two opposing currents don’t come into contact and create a short circuit within the breaker.
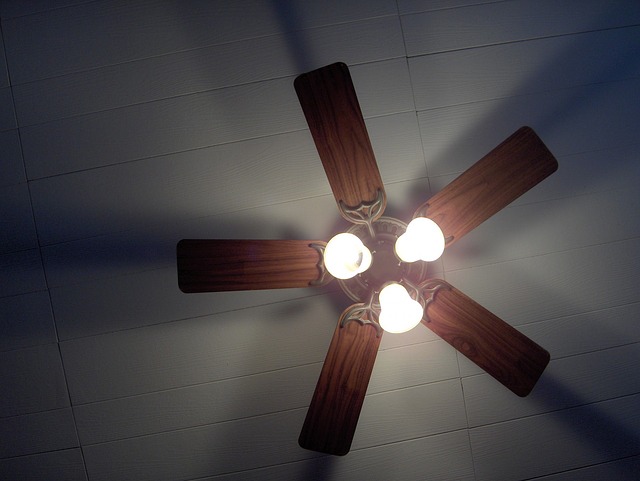
The breaker switch can then be switched back on to test the connection created and with that, you have correctly mounted a ceiling fan. Flick the switches to test out the fans rotation as well as the emitting light.

While these steps are comprehensive, we understand they might still be a tad esoteric for some who are not naturally handy. So, if you still need a video demonstration to make things clearer, then check out the video below:
Conclusion
Putting together a ceiling fan and light takes proper planning but is quite easy to handle as you have read (and watched). When taking up something like mounting a ceiling fan, the task might seem a bit daunting. But with the proper steps taken and the right amount of care, it can be easily handled. Just note the following:
1. A ceiling fan requires adequate support for it to be mounted safely so a bracing is needed.
2. Be careful when working with electrical appliances to avoid getting electrocuted. Ensure you use all the necessary safety equipment, gloves, the whole nine yards. Better to be overdressed than sorry.
3. Test the weight of the fan so as to make sure that the joist can sufficiently carry the weight with no damage.
4. Carefully secure all naked copper wiring with adhesive tape so as to prevent the wrong flow of current to opposing wires.
5. Ensure the light fixture is properly attached and the wiring connections are all well connected.
6. Finally, ensure these tips are followed completely so as to reduce the chance of damaging the circuit or the handling of the ceiling fan as well as to avoid blowing out the light fixture.