
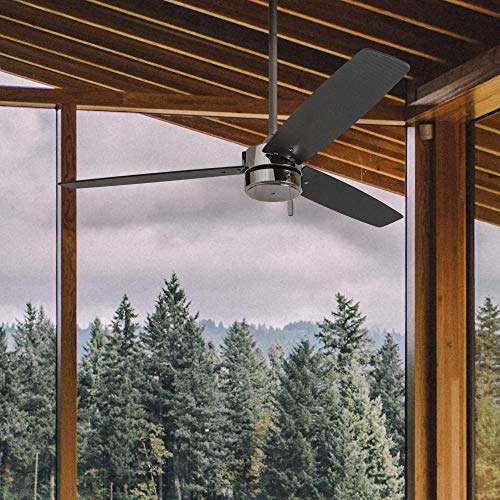
Ceiling fans are ideal for most indoors and outdoors location and are an ideal way to keep cool especially on hot days. If you need to know how to install a ceiling fan under a deck in your house, this article explains how.
Many homeowners are beginning to welcome the idea of outdoor spaces and even see them as the extended area of their homes. Some owners even use this part of the house to carry out entertaining activities while enjoying being outdoors.
Installing a ceiling fan in the exterior part of the house has the ability to create a relaxed ambiance while also helping to keep the space cool. So they pretty much have the same functions as ceiling fans installed inside the house.
Additionally, outdoor ceiling fans can help to prevent mosquitoes and other insects from flying around in outdoor spaces as a result of the breeze created. They help to keep outdoor spaces cool on humid nights and scorching days.
Ceiling fans can be installed in a number of outdoor spaces and they include gazebos, porches, verandas, and covered decks.
Table of Contents
How To Install A Ceiling Fan Under A Deck
To successfully install your ceiling fan under a deck, all you need to do is follow the step by step instructions below:
1. Make Sure You’ve Selected The Right Fan
If your ceiling fan will be installed on a deck that is very high, make sure you’ve selected a fan model that comes with a pole extender.
If the ceiling fan will be installed on a deck with a low ceiling, make sure you select a flush mount model.
The ceiling fan blades should be chosen in accordance to the size of the room which the fan will be cooling. Essentially, the larger the size of the room, the longer the size of the blades should be.
In order to measure the length of the blade, start from the tip of one of the blades and measure to the tip of the blade located on the other side.
If you decide to buy an outdoor ceiling fan that also comes fitted with a light kit, ensure that the light kit is also usable outdoors.
2. Get The Support Brace Installed
Ceiling fans designed for outdoor use are usually made with materials that are weather-resistant. This means that they have been designed specially to prevent moisture from getting into the important parts of the fan such as the electrical and motor parts.
First, you will need to make sure you’ve switched the electricity supply to the ceiling fan area off. Once you’ve done this, you will have to remove any existing light fixtures. Usually, a support brace is fixed to the electrical junction box.
It’s important that you get this brace replaced with a better and sturdier brace. This will make sure that the ceiling fan is adequately supported the right way.
It’s also critical that the fan blades are installed before they are used to hook the fan to the bracket. This is so you don’t waste a lot of time and don’t get frustrated by too long a process.
3. Get The Wires Reconnected
You will need to get the wires reconnected once the installation is complete. This can be done by making use of weight strips which help to keep the fan blades balanced. (Click here to read more about balancing fan blades).
They also help to improve the efficiency of the ceiling fan. Additionally, it helps to reduce any wobbling present in the ceiling fan.
A lot of ceiling fan units also include remotes which allow owners to adjust the speed of the blades quite easily. This is a very useful addition since there will be times you won’t be so close to the fan and would need to adjust the speed.
Additional Tips For Installing A Ceiling Fan Under A Deck
1. Determine If The Fan Should Be Installed In A Specific Area
Most fans usually have a symbol on them that indicates which area of the house they are suitable for. This symbol could display costal use, alfresco or indoor or outdoor only.
Fans labeled as suitable for alfresco areas are ideal as long as the fan is installed in an area that is fully covered and has 2 walls at the very minimum.
This type of fan also has to be installed in an area that is safe from wind, water, salt or dust. It should also not be fixed under an open pergola.
This is because moisture and even rain can easily access the motor of the fan. We’re sure you don’t want this as this can damage the fan.
If the ceiling fan is not going to be installed under a covered area, it will be exposed to moisture and, of course, the weather.
It’s important that you select a fan labeled specifically for outdoor use so you don’t run into any unnecessary stress and issues.
Another thing to consider is how large the space you’ll be installing your ceiling fan is. This is because it’s important that the air can circulate effectively throughout the space of the deck.
If the deck has a screened-in area, then the breeze effect from the fan will be quite strong. If the deck area has no protection surrounding it, then it’s advisable you choose a ceiling fan that has more power. This is so that air can move around more effectively.
2. Ensure The Deck Has Enough Walls
This is because the air created by the ceiling fan will require an adequate number of solid surfaces in order to bounce off them. Without this, the fan won’t be able to create a cooling effect in your outdoor space.
For outdoor spaces, a lot of the breeze felt usually happens if you happen to be standing directly underneath the fan. This means that within the perimeter outside the blade tips, the cooling effect reduces rather dramatically. And so, the further away you’re standing from the fan, the less likely you are to feel the cooling effect.
An ideal area would have a minimum of 3 walls with a ceiling included so that the ceiling fan can create a steady breeze flow. This way, you and your guests can always feel refreshed and cool.
3. Make Sure The Blades Of The Ceiling Fan Are Suitable
There are a variety of options when it comes to choosing blade material for your ceiling fan. They have their unique advantages and disadvantages. These are listed below:
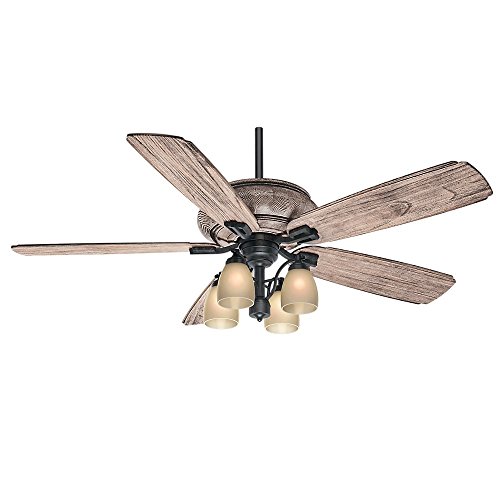
Timber
Although some people might not agree, the truth is that timber is very much suited for use in outdoor ceiling fan blades.
Just ensure that the ceiling fan is installed in an area that is fully covered such as a deck. Timber ceiling fan blades, because they are wooden require more frequent cleaning than other blade materials. They may also need replacing ever so often.
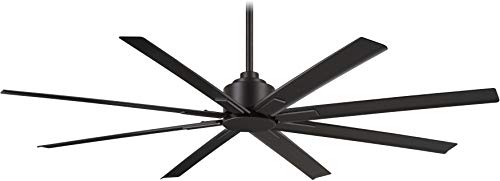
Stainless Steel
Ceiling fans that come with stainless steel metal for blades are another ideal choice. This is because they have the best durability when it comes to their ability to withstand the elements and rust.
Additionally, the blade pitch helps to move the air around in a more effective way, especially in a large space.
It is generally advised that ceiling fans which are to be installed for use outdoors are treated thoroughly with neutral oil. An example of this is ‘Steel Kleen.’ This process has to be done a minimum of four times a year repeatedly.
It’s also important to get the ceiling fan treated before its installed as well. If corrosion or tea staining occurs on the fan, you can use a product such as Steel Power to fix the problem. This can then be followed by Steel Kleen oil treatment to complete the process.

Acrylic And ABS Plastic
These fan blade materials are also ideal for outdoor ceiling fans.
4. Ensure It Has The Right Style
It’s important to select the right material and size of ceiling fan however choosing the right style is just as important.
Make sure the ceiling fan you choose matches the existing décor in your home for a seamless fit. If your outdoor area has a color scheme, you can either complement or contrast the colors to achieve the effect you desire.
The shape and the number of blades in addition to the color are all important parts to ensuring the space is inviting and warm.