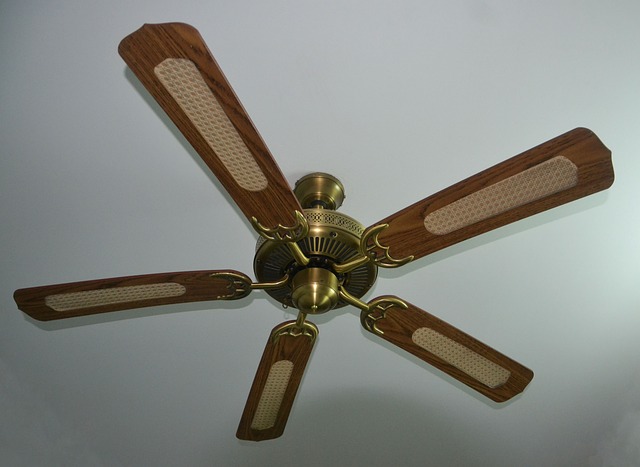
If you have ever had to stand under a noisy and very wobbly fan, you would understand the fear that comes with the thought of the fan landing on your head. Or, if your ceiling fan has ever made squeaky sounds while working, you must have been very frustrated and maybe even put it off.
Well, malfunctions like that are bound to happen but that does not mean you have to continue enduring the annoying sound or buy another fan. When your ceiling fan behaves like that, it only means it is imbalanced and needs some balancing. So, to get your ceiling fan back in good shape, there are some steps you have to take.
The answer to the question “how do you balance a ceiling fan?” comes in two basic methods, both of which will be discussed in detail here.
Table of Contents
Sometimes All Your Fan Needs Is Some TLC… Tender Loving Cleaning
The first thing you need to do is to mark your blades in order to easily keep track of them throughout the balancing process. After this, the next step to take is to ensure that dirt has not accumulated on your ceiling fan because it is sometimes the cause of imbalance and if it has accumulated for a long time, it can cause the blades to loosen and start shaking violently.
If your fan has accumulated dirt and you want to make sure it is not the cause of the loose spinning, then you should follow these simple steps to clean your fan.
Steps to Clean Your Fan
Keeping your ceiling fan clean and dust-free determines the performance of the fan. If you want your ceiling fan to impress you, you should regularly follow these steps. The major material you need to clean your ceiling fan is a step ladder and a pillowcase. To prevent the dust from entering your nose or eyes, you could use a face mask or improvise with a handkerchief.
1. Use the pillowcase to dust the canopy, the downrod, and the motor housing. It is better to use a pillowcase because it has the kind of material that can cover every degree of excessive dust.
2. Press the pillowcase over a fan blade and pull it back. Do this continuously till the blades are clean.
If your ceiling fan is high, you could make use of materials like old sheets, a long-armed duster, and a face mask. Then go through the following steps:
1. Lay the sheet out under the area of your ceiling fan to clean the dust.
2. Mount the duster on top of the canopy and dust down the rod and motor housing.
If the dirt on the fan is from grease, you would need to make use of a step ladder, baby wipes, degreaser, or odorless mineral spirit, and an old sheet. Follow these steps:
1. Pour a small amount of degreaser on to a baby wipe and wipe down the ceiling fan.
2. Clean the fan from top to bottom.
After cleaning the ceiling fan and the squeaky sounds or wobbly movements are still there, then maybe you need to check the base screws. They are the screws you will find between the blades and the flywheel. Turn each screw in a clockwise manner using a screwdriver to make sure that each one is nice and tight. If a screw is missing, then, that is where the problem came from.

Click here to get the Flip-N-Lite 300-Pound Duty Rating 6-foot Stepladder with Platform!
Still Not Balanced? Check That Your Blades Are Not Warped Or Uneven
You need to make sure none of the blades are warped or uneven. If your blades are warped, then you will need to replace them. Just ensure that the new blades are made by the same manufacturer as your ceiling fan. To check whether your blades are not well aligned, you will take three different measurements between the ceiling and the blades at the same point for each of the blades.
Still Not Balanced? Time To Whip Out The Tools!
If you have tried all these and your fan still remains imbalanced, then, it is time to get down to business.
Tools: Some of the tools you will need include ladder, screwdriver, paper towels, yardstick, ruler, pennies, super glue, and masking tape.
Step 1: First thing you’d be doing is loosening the screws which hold the canopy cover. As you slide down the canopy cover, you’ll see the mounting bracket.
Step 2: In the next step, you’d be tightening the screws you find both on the outlet box as well as on the ones on the mounting bracket.
Step 3: Fix the screws on to the downrod firmly and make sure that the pins are all in their place and firmly too.
Step 4: Ensure the fan blades are secured to blade holders and the blade holders are also secure to the motor housing.
Step 5: Gently press up and down to adjust the bent blade holders.
Step 6: Now, from the blade tip to the ceiling, measure the distance between both points. You must make sure that no blade is further from or closer to the ceiling than the rest.
Step 7: Adjust any bent blade holders until they are at equal distance from the ceiling.
Step 8: Go ahead to switch your ceiling fan on to make sure that the wobbling sounds have stopped.
How Do You Balance A Ceiling Fan Using A Balance Kit?

Click here to get the DYSMIO Lighting Fan Blade Balancing Kit – 2 Pack!
More advanced balancing procedures may result in the balance kit method. Although you can improvise tools at home for the balancing kit, it is still safe to purchase the kit in a home-improvement store. The basic tools for the balance kit method are clips and weight. Some of the tools in a balancing kit are dimes, tapes and coins. Coins can be used in place of weights.
Before you resort to using a balancing kit, make sure you have done the following:
- You have cleaned the dirt out of your ceiling fan to make sure it is not the cause.
- You have secured and tightened all the screws on the motors and the blades to ensure it is not the criminal.
- You have ensured that your blades are neither warped or bent.
After these steps, you can go on to start using the balancing kit. Most new fans come with a balancing kit inside it but a regular blade balancing kit is made up of a plastic chip and three balancing weights.
Step 1: Go to your fan controller and carefully make efforts to identify what speed causes the fan to wobble. Most times, it is the highest speed.
Step 2: After identifying that, turn off the fan and wait until the blades come to a complete halt.
Step 3: Pick up the plastic clip and place it on the blade’s edge. It should be halfway between the blade tip and the blade holder.
Step 4: Turn on the fan again to determine the improvement.
Step 5: If nothing changes, you’d have to try another method. So, as usual, put off the fan and wait for the blades to come to a halt.
Step 6: Move the clip along the edge of the blade in order to determine the find out where exactly the instability or wobbliness is coming from. Do these for all the blades.
Step 7: Once you’ve been able to identify the “culprit,” fix a balancing weight on the center line and make sure the weight is parallel to the clip.

Click here to get the Dysmio Lighting 42-Inch White/Bleached Oak Replacement Fan Blades, Five-Pack!
Conclusion
Usually, these steps should solve the problem but if not, verify that the outlet box you used in installing your fan is meant specifically for fans and can withstand the fan’s weight. Also, check to see if the outlet box is attached firmly to the ceiling joists.
At this point, if nothing is working, you might want to get in touch with an electrician (a licensed one) to check the installation or else, you might have to purchase a new ceiling fan.
To balance a fan is not so difficult once you have the necessary tools and pay attention to the steps except the fan is in a deplorable state and needs a replacement. Click here to learn How To Replace A Ceiling Fan.