You may be bored with how basic and bland your fan looks at the moment or you might just want to add some variety to the way your interior looks at the moment.
Crafting a beautiful home interior that suits all your design needs is a constant work in progress. There are always new and exciting ways that you can improve it and ways you can change it to make it look better. One of the ways you can do this is by revamping or upgrading the light in your living room by installing a chandelier.
Whatever the case may be, in this article we will detail how to attach a chandelier to a ceiling fan in simple and easy to follow steps. The best thing is that these days, you no longer have to decide between installing a ceiling fan or a chandelier. You can have the best of both worlds at the same time and in the same room: the comfort of a fan and the elegance of a chandelier.

Table of Contents
How To Attach A Chandelier To A Ceiling Fan
Step 1: Remove The Current Light Fixture
Replacing your room’s existing chandelier or ceiling fixture with a ceiling fan which also has its own light fixture is an easy do it yourself project. You just need to make sure you’re comfortable with basic electrical upgrades.
This project is only slightly more difficult if the room does not already have an existing fixture. (By the way, you can learn How To Install A Ceiling Fan Where No Fixture Exists by clicking on this link). If this is the case it will mean you have to cut through the ceiling to install new wiring and a switch.
To Replace An Existing Fixture:
- First turn off the electricity at your home’s main electrical circuit. This circuit powers the light and its corresponding switch.
- Cover the switch with tape to ensure it doesn’t turn back on while you work.
- Use a circuit tester to make sure that the power is completely off before you touch any of the electrical wiring.
- Disconnect the fixture wires.
- Remove the central mounting nut and any screws which are holding the fixture in its place.
- When you’ve removed the fixture, try and determine if the electrical box is securely fastened to a ceiling joist or support bracket. This is because fans can weigh as much as 50 pounds and need a sturdy mount.
- If your ceiling box is surrounded by drywall or other materials, you may have to access the joists from above e.g. through the attic. This is so you can inspect it and attach a support brace if you need to.
Step 2: Set up a Support Brace
If you have access from above, you can make and set up your own support brace. You can use a length of 2 by 4 lumber nailed to the ceiling joists on both sides of the box location.
- Position the brace directly above the ceiling box.
- From below, use wood screws to fasten the ceiling box firmly to the brace. If you don’t have access to work above the ceiling, you can fix an expanding metal brace from below to support the fan and ceiling box.
- First, remove the existing box.
- Insert the brace up through the hole.
- Secure it in position by forcing up the mechanism into its place.
- As the ratchet is turned from below, the arms on the brace will extend until they make contact with the ceiling joists. The ceiling joists are on both sides of the hole.
- The spikes on the arms will anchor securely into the wood.
- Some braces are offered with a ceiling box attached. Alternatively, you can attach the existing ceiling box to the brace.
This method can also be implemented to mount a fan on a ceiling where no electrical fixture was previously installed.
After you’ve cut a hole in the ceiling, route the electrical wiring to the hole from a convenient and nearby junction box. After this, install the brace and new ceiling box as described above.
")
Step 3: Install The Fan Mounting Bracket
Most ceiling fans come with a mounting bracket. However, if yours does not, you can purchase a mounting kit separately. You can attach the bracket to the ceiling box by following the instructions of the manufacturer.
Typically, this bracket consists of a circular receptacle for a ball mount and is installed on the extension rod or the fan motor. If you mount a fan too close to the ceiling, it will restrict air circulation so an extension rod of any length is usually recommended.
If you use an extension rod to suspend the fan:
- Tape the ends of the fan motor wiring together temporarily.
- Now pull the wiring through the rod.
- Attach the rod to the fan motor.
- Secure the ball mount at the topmost part of the rod.
Step 4: Attach The Fan Motor Wiring
- Mount the fan motor to the ceiling bracket by placing in the swivel ball into the bracket.
- Attach the fan motors to the house wiring. This typically requires connecting white to white (neutral) wires and black to black (hot) wires.
- If your fan has a green insulated or a bare copper wire, attach this to the existing ground wire then connect the two to the metal electrical box.
- Extra wires or a receiving unit may be included for an optional remote control operator. This allows you to control the fan and light without using a switch or a pull chain. Ensure you follow the wiring instructions from the manufacturer very carefully.
- Use wire nuts to secure all the connections.
Step 5: Attach The Blades Of The Fan
- Install the fan canopy which covers the mounting bracket and the ceiling box.
- Attach a blade mounting bracket to each of the fan blades. Attach these brackets to the rotating bezel located below the motor of the fan. Make sure all the mounting screws are tight. If they are not tight, the blades will be loose. Loose blades will cause the fan to wobble when it operates so ensure the screws are tight.
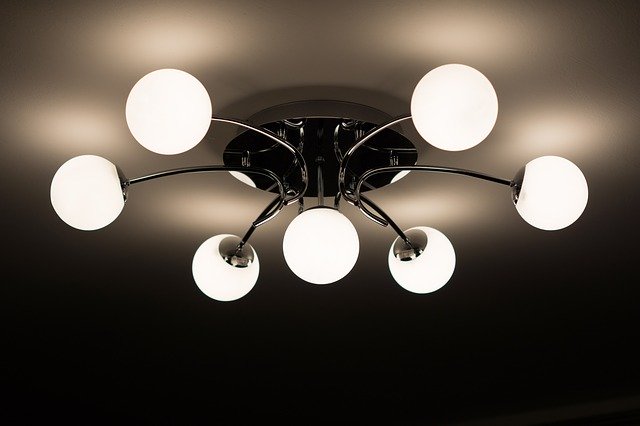
Step 6: Attach The Chandelier Light Fixture
- If your fan comes with a chandelier light fixture, assemble the fixture and switch housing (if provided).
- Attach the chandelier light fixture to the motor assembly of the fan.
- Connect the wire strictly in compliance with the instructions of the manufacturer.
- Install the glass dome if it has one, any additional decorative light shades and bulbs.

Step 7: Connect The Wall Control Switch
Most fans are usually controlled by a rheostat type of wall switch. The only problem with this is that it only allows for basic on and off and fan speed operation.
If you would like the option to reverse the direction of your fan or circulate warmer air near the ceiling in cold winter months, you will have to manually operate a reversing switch. This switch is located on the fan housing.
Some modern fans today include smart electronics which increase the different functions that can be controlled from one switch. These functions include forward or reverse movement and the option to dim the lights. The best part about this is the fact that you will not need to replace or upgrade the existing wiring in your home.
Before you install a new wall switch for your unit, first recheck the existing switch wiring. Use a circuit tester to help you do this. A circuit tester is needed to make sure that the power is off.
Install the fan control switch while strictly following the instructions of the manufacturer.
Turn the power back on then test the operation of the fan and chandelier under all the operating modes of the fan. This is to ensure everything is working properly and is in correct order.
To view a short video of this process watch the video below:
Remember To Measure Your Ceiling Fan
You will need to also determine the right size of the fan to be installed in the room. Generally speaking, the larger the room, the bigger a fan you will need.
First, measure the longest wall in the room you want to install the ceiling fan. If the wall less than 12 feet, you will need a fan that is 36 inches in diameter. If the longest wall is between 12 and 15 feet, it is advisable you get a 42-inch fan. Anything longer than 15 feet will generally require a 52-inch fan.
Learn more from our article: How Do You Measure A Ceiling Fan? Click here to read it.

Tips For Finding The Right Chandelier To Attach To Your Ceiling Fan
Before you go chandelier shopping, it’s advisable you find out the limitations (if any) of the space you intend to install your ceiling fan.
1. Choose Your Mounting Options
Generally speaking, you will want the bottom of your chandelier to be hanging at least 7 feet from the floor. If your ceiling is taller, aim for approximately 10 feet.
If your ceiling is 8 or 9 feet tall, then a chandelier may not be the best choice. Instead, you should aim for a low profile fan that can be mounted against the ceiling. They are often referred to as huggers. For a taller ceiling, you will have more space both below and above the chandelier.
The mounting options you need will differ depending on the height of your ceiling. For example, if you want the fan to be hanging a few feet from the ceiling, you will need to purchase a “close to ceiling” mounted fan.
If your ceiling is taller than 10 feet, you may need to consider a longer down rod. This is an extended rod that hangs the chandelier further down from the ceiling. Some fans come with this option, however, you might need to purchase an extra mounting kit for others.
You may also need to purchase an extra mounting kit if you want to hang your chandelier fan from a vaulted ceiling.
For a vaulted or sloped ceiling, ensure you measure the correct ceiling height based on the position on the slope you want to install the fan.
2. Choose The Right Lighting
Remember your chandelier is also going to be a source of light so you should think about how you would be using the room. If you use it for activities that involve a lot of detail, you would need to make sure the lights are as bright as possible.