Hey there homeowners! You’ve probably just bought a new ceiling fan and are all excited about how you can now keep your home nice and cool. However, you just realized there’s no existing fixture to facilitate this process.
Here, we will show you how to install a ceiling fan where no fixture such as light or power exists. We also have a guide on How To Fix A Ceiling Fan, click here to read it.

Table of Contents
How To Install A Ceiling Fan Where No Fixture Exists
1. Decide Where Your Fan Will Be Placed
You’ll need to determine where exactly in the room you would like your ceiling fan to be installed. To do this, you can use a stud finder located on the ceiling in other to determine where the joists are located and which direction they run.
You will need to securely mount the electrical box for your fan to one or two joists depending on if it’s been placed between two joists.
Ensure the electrical box you use including any support bars have been designed to be used with a ceiling fan. Make sure you get a box which can hold up the vibration of the ceiling fan and the weight.
2. Decide Where Your Power Source Will Come From
Ceiling fans generally cannot be installed without any wiring present. So, in cases where you don’t have any access to wiring, the electrical box will need to be installed by you.
Now you need to decide the power source to be used in the ceiling fan. You can draw power from an existing circuit in your house. However, if you’re not entirely sure the circuit has been overloaded, you will need to run a new wire leading to the electric panel and get a new breaker installed.
This method ensures that if you do need to add additional fixtures, your circuit would only be loaded partially and it will be easily accessible from the attic of your house.
Now, you need to decide where you want the switch or the switches to be located. Make use of a stud sensor to ensure your chosen spot is in between the studs and to also check for any existing wiring present inside your house walls. A lot of stud sensors are able to detect wiring inside the walls.
")
Click here to get the Stud Finder Sensor Wall Scanner!
We recommend you wire and allow for two switches to be installed with one switch to be used for the light attachment while the other can be used for the fan.
We also recommend that you still run a wire for the second switch even if you don’t need or plan to add a light now. We recommend this because it’s quite cheap to install ceiling fan lights. Plus, it saves you from additional work later.
3. Prepare The Wires Needed For Installation
At this stage, if you can employ a professional electrician to help you that would be recommended. Working with electricity is dangerous especially if you don’t know what you’re doing.
- First, mark and cut out any holes you will need to install the electrical boxes. Please note the boxes cannot be installed until after the wires have been run.
- Some electrical boxes come with templates. But if you don’t have one, trace around the edge of the box using a pencil. Use a sharp sheetrock knife or a keyhole saw to cut out holes.
- Now shut off the power supply then run the wire(s) from the electrical power or your alternative power supply which will be used to power the fan.
- Unless you will be tapping into a 20-amp circuit, we recommend you make use of a 14-2 wire with ground. Here, all wires you will be using ideally should be 12 gauges.
- Now run 14-3 wire with ground from your ceiling fan to the switches. If you like, you can run the wire directly from the panel to the switches however it’s much easier for potential future wiring if the lines are run from the panel to the box located inside the ceiling.
- Make sure you allow between 6 and 12 inches of wires to hang out of the hole at the end of each. At the panel end, make sure you leave enough wire hanging out at least 2 or 3 feet below the panel.
- Now shred each end of the cables while you leave approximately half an inch or a little more of cable insulation to protect the entry point of the wire into the electrical box.
- Make sure you don’t cut into the insulation present on the wires which are located inside the sheath of the cable.
4. Mount The Electrical Box And Prepare The Switches
- This next step should be done according to the instructions of the manufacturer – pull the wires inside the electrical box and place the box into the ceiling. Do ensure the box is strong enough to support a vibrating and heavy fan.

- Make sure you don’t run the power wire directly to the main electric panel or alternative power source until you’ve completed everything.
- If metal boxes were used or you have ground screws, connect a bare or green number 14 copper wires approximately 6 inches long to the box. The other end of the box can be attached using a wire nut to other ground wires at a later time.
- To prepare the switches, connect two 6-inch pieces of green insulated wire or bare copper wire to the green ground screw on both of the switches.
- Now connect one 6-inch black insulated wire to one side of both of the switches. This can be done by stripping approximately one inch off the end of the black wire and then ensuring it’s connected to the screws on the side of the switch. You can also achieve this by pushing the shredded end into the push-in connections.
- If screws were not used here, make sure you tighten them securely to reduce the risk of short circuits as a result of the screws making contact with another wire or the electrical box.
- Now use black electrical tape to cover the whole length of the white wire inside the switch box. You can use a wire nut to connect the ground wires from both of the switches and the wire from the box (if it applies) to the naked copper ground wire from the 14-3 cable coming from the ceiling fan.
- Now strip approximately half an inch of insulation from the uncovered ends of each of the insulated wires including a red wire, a white wire which has been taped black from the 14-3 cable, a black wire and two black wires coming out of the switches).
- Using a wire nut, connect the three black wires together. Now connect the white wire which has been taped to the other side of one of the switches coming out of the black wire. Repeat this process for the red wire, in order to connect it to the other switch.
- Now fold the wires to arrange them inside the electrical box while pushing the switches into their respective positions.
- Use the screws present at the bottom and the top of each switch to hold them in place while pulling them in until they are even with the wall.
- Place the cover place on top of both switches, and then screw it in till it remains in place.
- We recommend you use a step ladder to have access to the electrical box for the ceiling fan.
- Use black electrical tape on the whole length of the white wire from the 14-3 cable to ensure the white insulation is no longer noticeable.
- Strip approximately half an inch of insulation from the end of all the wires which are insulated in the box.
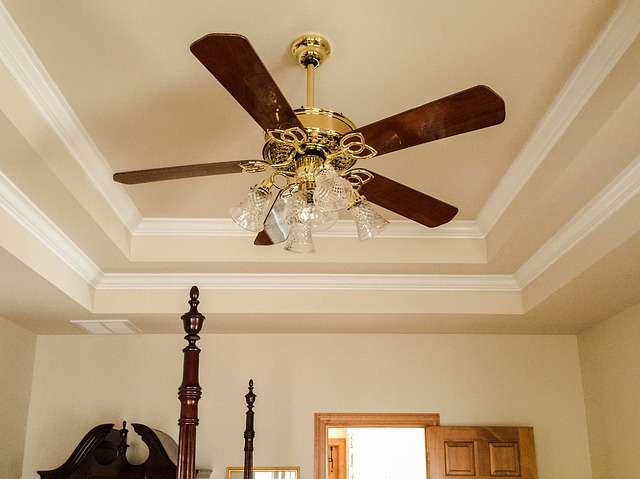
5. Mount the ceiling fan

- First, you will need to assemble the fan according to the instructions from the manufacturer.
- Attach the holding which comes with the fan to the electrical box in accordance to the instructions from the manufacturer.
- Now you can suspend the fan from the holding fixture.
- Connect the ground. Note, there will be most likely be a blue, grey, black or white wire, in addition to a green insulated or bare copper wire coming out from the top of the ceiling fan. You may also notice a ground wire coming out from the holding fixture.
- Connect all the ground wires (including the wires from the holding fixture, the fan and from the two cables and from the electrical box (if it applies) together with a wire nut.
- Connect the white wires together i.e. the one from the 14-2 power supply cable and the one from the ceiling fan.
- Connect the black wires together i.e. the one from the 14-3 cable and the one from the 14-2 cable.
- Connect the black wire from the ceiling fan to the wire which has been taped black to the 14-3 cable.
- Connect the red wire to either the grey or blue wire from the fan.
- Install the cover.
- Finish installing your fan.
Watch the video below if you need a video demonstration on how to go about everything we outlined above.